
We will be making an application that can run on android / iOS and can also be used on desktop. Using the kivy library to build the app we will be getting it for desktop and mobile version both. In this section we will be just making a login page.
Let’s first start with looking over the dependencies required for this project.
1. Install Kivy, a cross-platform library on your system.
As I am doing it on Ubuntu and using python3.6 version, will be demonstrating the installation steps for the same.
Install kivy for python3 using :
python3 -m pip install kivy
You would have to install python3 first, and then go with the above step. Also before this, I installed the kivy library simply doing pip install kivy which eventually showed me the installation complete though I ran into a error at the time of execution. Remember to configure your IDE with the same version of python you are using for kivy.
Sometimes you may get installation errors or at the time of execution of the kivy app you might get a “[CRITICAL] [App] Unable to get a Window, abort error ” If that’s the case, run the following commands:
python3 -m pip install --upgrade pip setuptools wheel
python3 -m pip install docutils pygments pypiwin32 kivy_deps.sdl2==0.1.* kivy_deps.glew==0.1.*
python3 -m pip install kivy==1.11.1
Let’s now start with creating our user login page.
Create a “.py” file which will be holding the main logic for the python program. I will be naming it main.py as it will be helpful at the time we deploy our app and convert it to the executable format on the mobile interface, So I won’t have to rename my program file again later.
Next we need to create a “.kv” file which will be containing the root widget and will be written in kivy language.These widgets act as the building blocks for the Graphical User Interface. This is basically the design of the application,how our front-end looks like. I will be naming this file as “graphics.kv” this totally depends on whatever name you want to give. Put these two files under the same directory.
Now we start writing the logic in our python file as follows :
from kivy.app import App
Here we imported the main object App from kivy.
from kivy.uix.button import Button
This is the object to create an actionable button.
We would also have to link the python file with the kivy file using the “Builder” object from “kivy.lang” as in we will be loading our root widget here, so we import it by :
from kivy.lang import Builder
If we want to build a multi screen application we would have to use another widget “screen manager”.
from kivy.uix.screenmanager import ScreenManager, Screen
Using the Builder object we will now link our both files by specifying our .kv file and loading the GUI by using the load_file() method as :
Builder.load_file("graphics.kv")
Now we will be working on the kv file, the kivy language as we understood helps us to create the widget tree and bind their properties to each other.We can also declare some instance widget as child widget just by declaring them inside the root widget.
As we are creating only single screen login page in the beginning, we will be just specifying our 1 login page screen name in the “graphics.kv” file. In kivy language the rules are written inside “< >” these brackets and the assignment is done with the colons.
<LoginScreen>:
The rest of the functions of this page will be written inside the widget we just created, so we have to either give tab or 4 indent as we do in python. We add another child widgets inside it which will be acting as instructions given to our screen.
<LoginScreen>:
    GridLayout:
        cols: 1
        GridLayout:
            cols: 1

        GridLayout:
Adding a GridLayout arranges the child widget by dividing the available space in the matrix. This is not actually visible on the front end but helps to decide the area for other visible child widgets thus keeping the screen in an organized manner.The above structure which I have created decodes as dividing the main Layout into two Layouts and this particularly is done on the basis of structure of my widgets/elements that are gonna go inside these Separate Layouts.By default the GridLayout is set to 1 column, still we have to give the number of columns otherwise the whole GUI goes to a left bottom column of our screen without giving any error in the code which further becomes difficult to troubleshoot. So we give the column division as cols:1 for our main grid and the first grid inside it.
Now we add the widgets that are visible on the front-end in the first Grid.
The first Widget “Label” is inserted holding the text as “User Login”.
The second and the third widgets for “Username” and “Password” will be our “TextInput” that is to accept the text from the user as input. So here we don’t give the hard coded text object in the textbox we rather have to give hint to the user about what is to be given as input in the textbox present, for that we use “hint_text”.
The fourth widget will be the Login Button to Submit the entry made.
All these widgets inside the Grid act as rows.
<LoginScreen>:
    GridLayout:
        cols: 1
        GridLayout:
            cols: 1
            Label:
                text: "User Login"
            TextInput:
                hint_text: "Username"
            TextInput:
                hint_text: "Password"
            Button:
                text: "Login"
        GridLayout:
Now Let’s also add the widgets in the second Grid.
As generally the login page has a Forgot password and Sign Up as two options we will be creating those as Buttons. Firstly we would be separating the Grid further into 2 columns so that we have both the buttons in the same row parallel to each other.
<LoginScreen>:
    GridLayout:
        cols: 1
        GridLayout:
            cols: 1
            Label:
                text: "User Login"
            TextInput:
                hint_text: "Username"
            TextInput:
                hint_text: "Password"
            Button:
                text: "Login"
        GridLayout:
            cols: 2
            Button:
                text: "Forgot Password"
            Button:
                text: "Sign Up"
Next up we add one more rule, so as we discussed earlier rules are declared in “< >” these brackets in kivy language, also we have to come out of all the indents inside the screen layout. The RootWidget that we are gonna put as rule actually records all the screens in the application and is not displayed on the front-end. In our case we just have one screen so we record that under our RootWidget. Now the LoginScreen will also be requiring a name so that it could be used for calling in the python file as it will be containing all the logic.
<LoginScreen>:
    GridLayout:
        cols: 1
        GridLayout:
            cols: 1
            Label:
                text: "User Login"
            TextInput:
                hint_text: "Username"
            TextInput:
                hint_text: "Password"
            Button:
                text: "Login"
        GridLayout:
            cols: 2
            Button:
                text: "Forgot Password"
            Button:
                text: "Sign Up"
<RootWidget>:
    LoginScreen:
        name: "Login_Screen"
We are done with the graphics part or the layout of our application how it will be presented to the user through this kivy language code in the “graphics.kv‘ file. The widgets that we created are the python objects and the rules are the objects which we will be creating as class in the python code.
Now we go to our “main.py” file created earlier and add the empty classes for the rules that are assigned in the .kv file with the same name as mentioned there. In our case they would be LoginScreen, which will be inherited from the Screen object which is imported from the kivy.uix.screenmanager and RootWidget, which will be inherited from the ScreenManger object is also imported from the kivy.uix.screenmanager.
Next we will also create a class using the App object and define a method “build” in it which is a pre-defined method under the object “MainApp”. This class is where you can put your UI code but in our case we have already designed the GUI part in the graphics.kv file, So we will further use it to make calls to the functions that defines the GUI for the application. In the build method we further return our GUI created that is the RootWidget as an object.
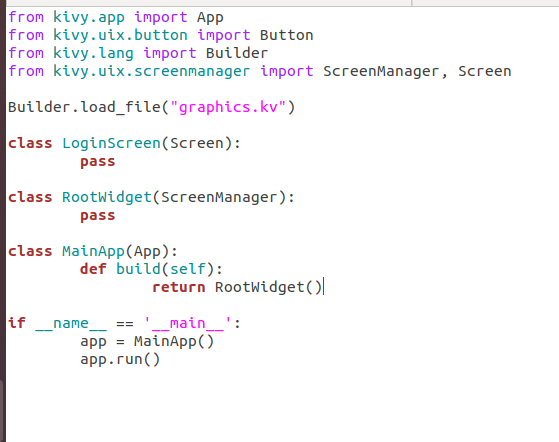
from kivy.app import App
from kivy.uix.button import Button
from kivy.lang import Builder
from kivy.uix.screenmanager import ScreenManager, Screen

Builder.load_file("graphics.kv")

class LoginScreen(Screen):
    pass

class RootWidget(ScreenManager):
    pass

class MainApp(App):
    def build(self):
        return RootWidget()
With this we have our logic present in the python file and the GUI in the .kv file, now we are just left with calling our MainApp class by creating a instance of it and then use the pre defined run method of the MainApp. Let’s just add that in our .py file.
Now we can run the main.py file and let’s check what we get. This is pretty much what we designed in our GUI, we have got the buttons as clickable and all the widgets that we mentioned. Now we have to obviously work on the spacing and padding for the elements on our front-end to make our application look appealing.

Let’s close the screen and make further changes.
Adding Padding in the GUI will be done by passing the attribute “Padding” of the GridLayout Widget/Object. So it works as [padding_left, padding_top, padding_right, padding_bottom] these parameters in the padding attribute also it accepts in the argument form as [padding_horizontal, padding_vertical].
I am using the 4 parameter way as following in my graphics.kv file.

After giving the padding attribute we get a login page which looks like –

So in this section we just created the login page front-end, Further we will be creating the signup link page and error page and their functioning.
Till that Happy Coding 🙂

One thought on “Getting started with mobile application development using Python and Kivy”